Corey Bailey
Audio Engineering
USEFUL INFORMATION
ANALOG TAPE: DO IT YOURSELF?
60 years ago or so, it was easy to spot a die-hard audiophile because he or she
owned a reel-to-reel tape recorder. I was one of them. I owned an early
production-model Roberts, which was considered to be one of the serious
audiophile decks of its day. Although the manufacturers tried to make home
recorders as simple as possible, the whole process had a rather steep learning
curve. It’s even steeper today.
Record collecting can be relatively simple, particularly if a person sticks to vinyl
LP’s (which, will make the selection of a record turntable and styli a lot simpler).
However, one can purchase a single turntable which will play all speeds and sizes
of records.
Reel-to-reel tape recorders are mostly format-specific. Tapes recorded on different
format recorders are generally not interchangeable.
When the business was active, in order to be able to play 98 percent of the ¼” tape
formats that were used, I owned (and had to maintain), at least, four tape decks.
This brings up the maintenance issue: Tape recorders are very complicated electro-
mechanical pieces of equipment for which very few (if any) parts are still available.
This also means acquiring the proper test equipment and learning how to use it. If
you want to try this yourself at the hobby level, the most difficult task will be finding
an affordable, working reel-to-reel tape recorder to get started with. There are some
talented technicians that specialize in restoring old professional tape decks for
archival purposes. As you might imagine, those refurbished tape decks cost
professional prices. The alternatives are consumer and ‘Prosumer’ reel-to-reel tape
decks. Some have been expertly refurbished and good used ones can still be
found.
For those who are new to analog audio tape recording, here is a link to a student
primer provided by the University of California, Santa Cruz titled: Analog Tape
Recorders. Check out the Analog Tape page in my glossaries section for some
simple definitions and descriptions. Also visit my Links page. Some of the sites
there have volumes of information about playing and archiving audio tape.
You will need to learn how to identify the various formats, adjust parameters such
as azimuth, and be able to get the best out of decaying tapes that have been
improperly stored for years. I’m not intentionally trying to discourage you from
becoming a collector of audio tapes, I’m simply telling it like it is and suggesting that
you do some extensive research before jumping into a hobby that can easily turn
into a money pit.
One of the most popular uses for home reel-to-reel recorders was to make song
tapes of favorite songs from records or off-air. I made a few myself way back when.
This is the vast majority of what you are going to come across at garage sales and
swap meets. Some are OK, some are poorly made. Of course, a lot of family
history was recorded on reel-to-reel tapes, and this is what you may find in
Grandma's attic. On the other hand, there were quite a few commercial recordings
made for reel-to-reel enthusiasts, and some still survive. Some are very collectible.
Acetate base tape
The vast majority of family history recordings on reel-to-reel tapes that I have
archived were made from the 1950’s through the 1960’s. This was the era of
acetate tapes that are now very brittle and delicate. This type of tape is prone to
breaking and leaving jagged ends that are difficult, if not impossible, to repair.
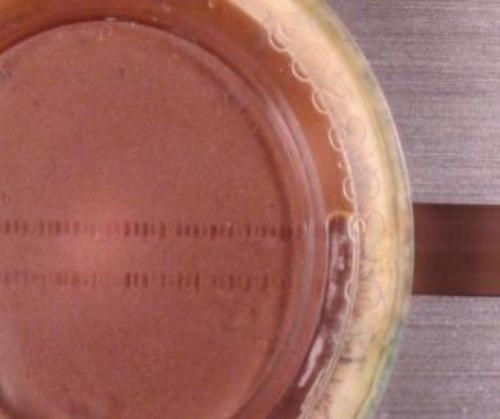
Acetate tape can be identified by holding the reel up to a bright light.
If you can see light through the reel,
it’s most likely acetate because the
acetate base is clear.
Fig. 1 is a 7” reel of acetate tape
being held up to a 40 watt light.
The light transmission is obvious.
Polyester tape, (Fig 2.) when held up to
light, is opaque.
(The light on the surface of the reel is the
camera flash.)
The caveat here is that if the acetate tape in
question is suffering from a deformity called
‘cupping,’ it may not pass light edgewise as well as shown in the example. Cupping
is when the edges of the tape curl up somewhat, making the tape resistant to
wrapping on a reel. The tape itself looks like the shape of a metal Venetian blind.
Cupping results from the tape losing moisture over time. If severe enough, cupping
can cause the oxide to fall off the backing. You will usually notice the oxide flaking
condition on the outer wraps of the reel. While making acetate tape easier to
identify because the clear base is now identifiable, flaking is non-reversible. If any
of the recording has separated from the base, it’s gone forever, turned into a small
pile of oxide flakes. If the Cupping condition is not severe, there is a possible
treatment that can be done called a ‘B-Wind’ whereby the tape is wound onto a
take-up reel with the oxide out. The reel of tape is stored for a period of time to
possibly reverse the condition.
Acetate tape that has become too brittle to be playable can sometimes be re-
hydrated. The short story is that acetate tape usually can be re-hydrated if left in a
moist environment. This can be as simple as placing some dampened (not wet)
cotton balls in the corners of the tape box with the tape for 24 hours or so, or as
complex as making up a system which suspends the tape over distilled water in a
closed environment and left for a period of time. The key is to not have the tape
come in contact with the source of the moisture. I have written a separate article on
this subject which goes into more detail: Moisturizing Acetate Tape. If you have old
tape you suspect is brittle acetate, consult a professional or do some research
before attempting anything. The information is out there.
Polyester base tape
Polyester base audio tape first appeared on the market in the early 1950’s, and, by
the late 1960’s, it had basically replaced acetate base tape. Polyester base audio
tape was readily embraced by the professional audio community because the
improved oxide formulations allowed for increased dynamic range. Unfortunately,
during the mid 1970’s, many manufacturers changed their oxide formulation (mainly
the binder and lubrication chemistry), and things started to go bad from there.
Some of those newer tape formulations had severe oxide shedding problems.
As it turns out, that was an indication of things to come in later years.
A surprisingly large percentage of polyester tape that was made in the last 40 years
or so, suffers from a condition known as binder hydrolysis. This is a condition
whereby the binder (used to adhere the oxide formulation to the polyester base)
has absorbed moisture over time, causing the oxide to become soft and sticky and
leave oxide deposits on all of the stationary tape recorder parts (Guides, Heads,
Tape Lifters, etc.). Quite often, the tape will chatter across the tape heads as the
result of a condition known as sticky-shed syndrome.
Ampex Corporation, one of the manufacturers plagued by the reformulation
problems, came up with the solution of ‘baking’ audio tapes at 130 degrees
Fahrenheit for 12 to 24 hours, depending on the size of the reel and the thickness
of the tape. Much has been written about this process, and the research continues.
Baking is a temporary solution because after a week or so at room temperature, the
problem tapes will return to their sticky state. Experience has shown that polyester
tape can be baked more than once. The possibility of adverse affects resulting from
audio tape baking is still being debated.
I discuss the baking process in a separate article.
Identifying the track format
One of the simplest ways to identify the track format of a recorded tape is to view it
with a magnetic viewer. This is a gadget that has extremely fine magnetic particles
suspended in a fluid. When placed
over a recorded tape, the magnetic
viewer shows the actual magnetic
recording and reveals the track
format….almost.
Here are two pictures of recorded
tapes revealing their format under
a magnetic viewer:
Fig. 3 (Right) is a 2 track stereo
recording. However, it could be a
half-track mono (recorded both
directions), since the two formats
share almost the same track width
and placement (0.01” difference).
If the tape is a half-track mono, one
channel will play forward and one
channel will will play backwards,
when played on a 2 track machine.
Quarter track can be recorded in both directions. If that is the case, you will see
four bands of magnetism. It could also be a four channel recording which, shares
the same quarter track widths and spacing. At least, by viewing the tape with a
magnetic viewer, you can tell which play head to use for continuing the
investigation.
If the quarter track tape shows four bands of magnetism, you will have to play it one
direction and then turn it over and check the other direction on a quarter track tape
deck. If the tape plays correctly in both directions, it’s a quarter track recorded in
both directions. If any the channels play backwards, in either direction, you’ve
probably got a four channel tape on your hands and will need a four channel tape
deck to play it. A quarter track tape recorded in both directions (most likely stereo),
played on a 4 channel tape deck will play both forwards and backwards at the
same time. Likewise, a quarter track tape recorded in both directions and played on
a 2 track tape deck will play both forwards and backwards at the same time with
one channel being lower in level if your machine is calibrated correctly.
Tape Thickness
Audio tape thickness is basically determined by the material used as the base.
The actual measurement is of the overall thickness. The oxide and the back coating
(if used) are very thin. The measurement itself is in one-thousandths of an inch and
is expressed in mils. All acetate back tape is 1-½ mils thick.
All professional tape is 1-½ mils thick. Polyester backed tape comes in three
thickness; 1-½ mil (also expressed as 1.5 mil), 1 mil and ½ mil which, is often
expressed as .5 mil. The thinner tapes may give a better head wrap and longer
recording time, but that’s about it. The downside of using a thinner tape is that there
is more of the possibility of crosstalk between the layers. Particularly, if the tape
does not have a back coating.
Lubricating audio tape
I will lubricate a tape suffering from binder hydrolysis or sticky shed syndrome first
because I consider baking to be a last resort. I have found that the method and
product that I use for lubricating polyester base audio tape to be about 90%
effective. If the oxide appears to be sticky or shedding during the lubricating
process, resists you in any way, stop and read my articles on baking or lubricating
audio tape to possibly determine if you should proceed. There are several
approaches, using a number of products and chemicals currently in use to lubricate
audio tapes. I use a lubricant specifically formulated for audio tape manufactured
by LAST Factory. Check out their website. They make products for records and
tapes along with information on how to use them.
I often have to use more lubricant on problem tapes than recommended by LAST
Factory. As you may have guessed, I have a custom built setup that I use for this
process. However, you can simply wet a cotton Texwipe® or any lint free cloth with
the lubricant and apply it to the oxide while rewinding or forwarding the tape very
slowly. By slowly, I mean roughly 5–15 inches per second. You can play the tape as
a convenient way to move it at a constant speed while applying the lubricant
however, I would recommend threading the tape directly from reel-to-reel. If you do
play the tape, I would recommend applying the lubricant on the incoming side of the
tape before it comes in contact with the heads and I would also recommend
covering the heads with Teflon® tape. Teflon tape is very slippery and will protect
the valuable oxide, plus it avoids unnecessary head wear. If it at all possible, avoid
any other stationary objects such as incoming or outgoing idlers or guides.
This is why I suggest threading the directly from one reel to the other.
While applying the lubricant, Use an eye dropper to keep the cloth wet. The kit from
Last Factory usually comes with applicators so, try them to see if they work for you.
Stop as often as necessary to re-fold the cloth and wet it again. You can back up
the tape some, if needed. No harm will be done if the lubricant is applied over a
section that has already been done. The lubricant does evaporate quickly from the
oxide however, I have not encountered any adverse effects from the layers winding
onto the take-up reel before the lubricant has evaporated completely. While I don’t
drench the tape, I do make sure that the coverage is such that the oxide gets wet.
Because I’m coming in direct contact with the fluid, I wear rubber gloves or
disposable food handling gloves for the application process even though I have
been personally assured by the manufacturer that all of their products are safe to
handle. I’ve used Last Factory’s tape preservative on all types of polyester base
audio tape and acetate base magnetic film as well with good results. I do not
recommend lubricating acetate base audio tape although the manufacturer says it’s
OK. Magnetic film (16MM, 35MM etc.) is different in that the acetate base is several
times thicker than audio tape and so is the oxide coating. LAST Factory claims that
treating magnetic media with their lubricant will increase shelf life. I have only
anecdotal evidence to support this, but I can say that I’ve noticed no adverse
effects on my own tapes after about twenty years of storage.
I have recently added an article dedicated to lubricating audio tape.
Baking Polyester Tape
First, I will only bake a tape as a last resort when no other restoration method is
applicable. I use a food dehydrator. It can be that simple. The dehydrator I use
regulates the temperature by manually adjusting the air flow through the unit. It’s a
simple dehydrator which has no temperature gauge. To make sure that things are
at the correct temperature, I use a very accurate digital thermometer with a long
probe that allows me to monitor the temperature at the tape reel.
I typically use a constant temperature of 118 - 120 degrees Fahrenheit (48 - 49
degrees Celsius) or less. You can be within 5 degrees or so and be fine. At 120
degrees Fahrenheit, the baking time will be 8 to 12 hours for ¼” tape. If you want to
be safe, operate on the low side and bake the tape longer. I’ve baked tapes at
around 115 degrees Fahrenheit for 24- 48 hours and longer with great results.
Avoid temperatures exceeding 130 degrees Fahrenheit (54.5 degrees Celsius)
because you will risk damaging the tape.
I have also written an article dedicated to baking audio tape.
Important:
Know that not all brands or types of polyester audio tape will respond to the baking
process. Make absolutely sure of the type of tape you have. Research it well before
trying anything.
Whatever type or brand of oven you use, it has to be temperature stable within a
few degrees. Because the air temperature and humidity are ever changing, (time of
day, time of year), I run my dehydrator for several hours while monitoring the
temperature at the area where the tape is to be placed before I begin the process
of baking any tapes.
Any oven used for the purpose of baking magnetic tape should not be used for
anything else. It should go without saying that a food dehydrator should not be
used both for food and magnetic tape.
Always seek advice from a professional before trying anything for the first time.
Transferring Reel-to-Reel Audio Tapes
I’m not sure how to describe a process that takes years of experience. Getting the
best possible transfer is much more complicated than just threading up the tape
and pressing the Play button. I would start by doing lots of due diligence (a legal
term). Do the research and learn everything that you can. There are some articles
on this site that will help.
Audio Cassettes
While there are several formats, the Compact Cassette is the most common.
The word ‘cassette’ is a French word meaning: “little box.” The technology was
originally designed for dictation machines and the format was monaural which,
could be recorded in both directions. Compact cassettes became a consumer
format in the early 1970’s and the format was stereo that could also be recorded in
both directions. The tape itself is poorly supported which, in most machines, causes
skewing that leads to azimuth and wow and flutter problems. Many cassette
machines run at slightly different speeds making for compatibility problems. You will
find that many audio cassettes have been recorded with peaks well above the
normal recording levels than the tape was designed for. When it comes to
transferring cassettes that were recorded in mono or stereo, the main problem is
azimuth. I prefer to use a dual capstan machine for the format. A dual capstan
machine tends to hold the tape steadier. Some Nakamichi cassette decks have pad
lifters which, can also be a bonus. Here is a guide to transferring cassettes which,
is a downloadable PDF file: https://tinyurl.com/2p86v7wb
The only thing that I would add to the guide is to exercise all audio tapes. Fast-
forward and rewind all cassette based media before transferring. Learn what a
cassette in good condition sounds like while fast-forwarding and rewinding and
listen while exercising each one.
For reel-to-reel tapes, use the shuttle mode if your tape deck has one. Some tape
decks make tape head or lifter contact in shuttle mode which, can be a bad thing.
Otherwise, I recommend threading the tape directly from one reel to another,
using one hand (protected) to control the speed.
Storing Audio Tape
All of your audio tapes, records, and optical media should be stored vertically (on
edge). Store all of your magnetic audio recordings in a cool dry place that is away
from excessive heat or moisture. (So, how many times have you read that on the
label of a flour box?) Well, it’s true. Keep all of your magnetic media in an area
where the temperature and humidity are the most stable. Large fluctuations in
either will accelerate deterioration. Check with your local librarian or the internet for
information on this subject. Archivists recommend an average temperature of less
than 50 degrees Fahrenheit (10 degrees Celsius) and 30 - 40% relative humidity or
less. Those ‘ideal’ conditions may be difficult to attain in the average home, but
maintaining room temperature at 30 - 40% relative humidity (or less)
is possible. This likely leaves out the basement and attic unless one or both have
been built to maintain a stable temperature and humidity year round. Storing your
magnetic media on the highest shelf in a centrally located closet will probably be
the most stable environment in the average home. I live in the desert mountains on
the West Coast of the US, where a closet shelf works well and the audio tapes
have faired well over the years.
Analog tape recording has seen a niche resurgence by artists who prefer the sonic
characteristics of analog tape. During the heyday of analog recording, there were a
dozen or more manufacturers of tape stock and as many manufacturers of
recorders. Today there are only a couple of manufacturers of analog tape left and
nobody, that I know of, is making new reel-to-reel recorders.
I would be remiss if I didn’t mention again that if you have some old family
recordings and you are the least bit unsure about them, please consult a
professional before doing anything. You may have only one chance to play them.
My advice is always free and their is a ‘Contact Me’ button at the top of all pages.
Return to TOP of page
© Corey Bailey Audio Engineering


DO IT YOURSELF?
ANALOG TAPE
BAKING AUDIO TAPE
LUBRICATING AUDIO TAPE
MOISTURIZING ACETATE
TAPE
RECORDS (DISCS)
RECORD CLEANING
REPAIRING A BROKEN 78
FLATTENING A RECORD
ARTICLES
A Little About Sound
Bit Depth
Conductive Paint
Mold
Optimizing your PC
Packing Records for Shipment
People I have Known
Playing Records Wet
Playing a Wire Recording
Sample Frequency
Saving Your Family Video
The Alley
The Internet
The Ken Slater Tapes
Time Charts
Transfer Stories
Tubes vs Transistors
What Type of Wire?
Your Digital Data is at Risk


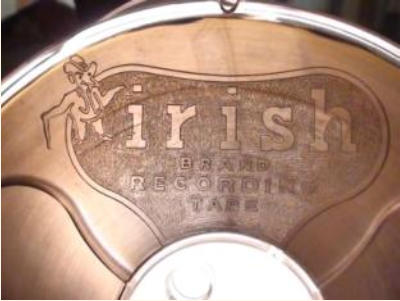
FIG 1.
Acetate Tape
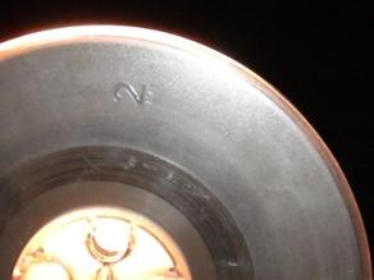
FIG 2.
Polyester Tape
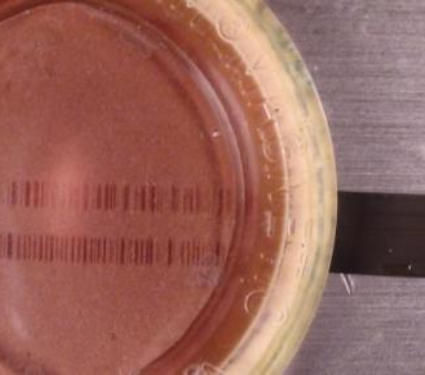
FIG. 3: 2 Track format
FIG. 4: 1/4 Track format
The picture to the Left,
(Fig 4) is that of a quarter-
track stereo format to
show the difference in
track width.